Frosted Holiday Sugar Cookies

Sugar Snowflake Cookies copy

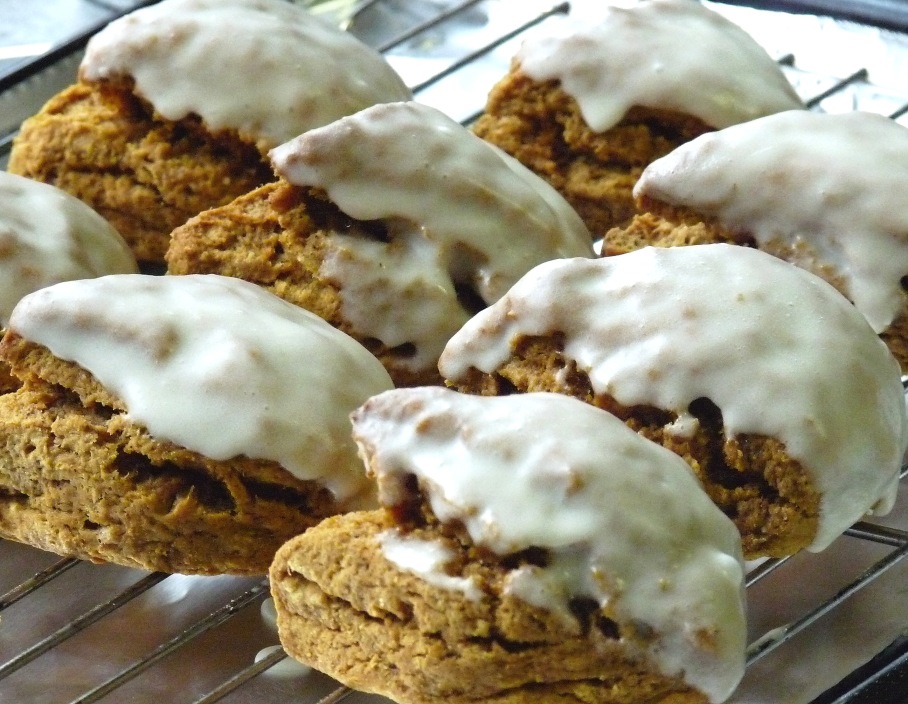
It’s hard to believe that it’s been over a year since I’ve updated this blog. I know, I know – for shame! But hey, let’s not dwell on how lazy (or in this case, pregnant) I’ve been and just get right back to the baking, eh?

With the holiday season in full swing, and my due date only 7 weeks away, I’ve got cookies on my mind almost constantly. Craving cookies. Baking cookies. Eating cookies. Eating more cookies. Eating all.the.cookies.

And with these little beauties in the kitchen, who can blame me? These cut-out sugar cookies are the softest and most delicious I’ve ever made (or eaten), and best of all, they’re a snap to throw together for even a novice baker. While I spent a great deal of time, energy and effort on frosting and decorating these snowflakes – and admittedly made a pretty big mess in my dining room in the process, oops! – the frosting is actually easy for even the littlest of cookie decorators to mix and use. This is the perfect cookie recipe for a baking day with your kiddos any time of year!

Credit for these cookies, and for the delectable icing they’re smothered in, goes to Sally’s Baking Addiction and allrecipes.com, respectively. I’ve made this recipe on multiple occasions and have had great results each and every time!


FROSTED HOLIDAY SUGAR COOKIES

Yields: 18-20 cookies

For the cookies:

  • 3/4 cup unsalted butter, slightly softened to room temperature
  • 3/4 cup granulated sugar
  • 1 large fresh egg, at room temperature
  • 2 tsp pure vanilla extract
  • 1/4 tsp almond extract
  • 2 1/4 cups all-purpose flour
  • 1/2 tsp baking powder
  • 1/4 tsp salt

For the frosting:

  • 1 cup confectioners’ sugar
  • 2 tsp milk
  • 2 tsp light corn syrup
  • 1/4 tsp almond extract

To make cookies:

  1. In the large bowl of a stand mixer fitted with the paddle attachment, beat the butter (which should be slightly softened but not melted) until creamy and smooth – approximately 1 minute. Add the sugar and beat on high speed until light and fluffy, about 3 or 4 minutes, scraping down the sides and bottom of the bowl as needed. Add the egg, vanilla, and almond extract and beat on high until fully combined, about 2 minutes, continuing to scrape down the sides and bottom of the bowl as necessary.
  2. Whisk the flour, baking powder, and salt together in a medium bowl. Turn the mixer down to low and add about half of the flour mixture, beating until just barely combined. Add the rest of the flour and continue mixing until just combined. If the dough still seems too soft, add one tablespoon of flour until it is a better consistency for rolling.
  3. Divide the dough into two equal parts. Roll each portion out onto a piece of parchment paper to approximately 1/4-inch thickness. Stack the pieces (with paper) onto a baking sheet and refrigerate for at least 1 hour and up to 1 day. (Note: Chilling is mandatory! If chilling for more than a couple of hours, cover the top dough piece with a single piece of parchment paper.)
  4. Once chilled, preheat oven to 350°F (177°C). Line 2-3 large baking sheets with parchment paper or a silicone baking mat. The amount of batches will depend on how large/small you cut your cookies. Remove one of the dough pieces from the refrigerator and using a cookie cutter, cut in shapes. Transfer the cut cookie dough to the prepared baking sheet. Re-roll the remaining dough and continue cutting until all is used.
  5. Bake for 8-11 minutes, rotating the baking sheet halfway through the baking time. The secret to the soft, tender centers in these cookies is underbaking; remove from the oven as soon as they look “set” and are very lightly colored around the edges. Allow to cool on baking sheet for 5 minutes, then transfer to a wire rack to cool completely before icing.
  6. After the cookies have cooled, frost using the instructions below. Store in an airtight container at room temperature for up to 5 days.

To make frosting:

  1. In a small bowl, stir together confectioners’ sugar and milk until smooth. Beat in corn syrup and almond extract until icing is smooth and glossy. If icing is too thick, add more corn syrup.
  2. Divide into separate bowls, and add food coloring to each to desired intensity. Dip cookies, or paint them with a brush, and apply sprinkles or edible ornamentation as desired. Allow to set before eating or storing.


Pumpkin Spice Scones

pumpkin-scones2

My longtime blog readers (hi Mum and Dad!) will know that pumpkin is the official flavor of October in our house, meaning that I’ll find some way to add the squash of the gods to most – if not all – of my recipes this month. While I got a bit of a late start on my baking this fall (seriously, where has October gone?!), I’m still determined to squeeze at least a couple of pumpkin treats into the mix before turning yet another page on the calendar.

First on the agenda: Pumpkin Spice Scones.

Given that its probably destined for legend status in our family, this recipe deserves a bit of a backstory. My mum – a great lover of scones – has been searching for the perfect pumpkin scone for years (possibly decades). Perfection is, of course, entirely subjective, and she gets that, but she actually had only one relatively simple requirement: she wanted her pumpkin scone to taste like pumpkin. Easy, right? Not so much. Every place she tried – from Starbucks to Trader Joe’s, and every trendy-but-not-nailing-it bakery in between – kept serving up orange-hued scones containing pumpkin pie spice but NO PUMPKIN TASTE. She even tried recipes recommended by family and friends – including those that, thank goodness, contained actual pumpkin – but something was missing. She was getting discouraged, and starting to lose hope (at least about scones). So when my parents came to visit late last month, I was determined to crack the case for my mum and send her home with the best pumpkin scone recipe of.all.time.

I scoured the Internet, as I so often do, for help in this endeavor. Recipes for scones “just like Starbucks!” popped up left and right (no thank you!), and it took me a while to weed through recipes that made no such claim yet still used the same ingredients. I finally stumbled across the winner – and what a winner it was! – from Once Upon a Chef. Mum, meet pumpkin scone perfection!

We’re convinced that a few things about this recipe really make the pumpkin taste stand out, including the use of dark brown sugar (instead of white) and the addition of molasses. Both impart a stronger flavor, which helped these rise (no pun intended) to a different level. We also loved the no holds barred approach to the spices, particularly the cloves. These were, hands down, the best scones we’d ever baked.

Just when we thought they couldn’t get better, along came the glaze. We couldn’t decide between a simple sugar glaze – made using confectioner’s sugar and cream – and a spiced pumpkin version, so … we made both. That’s right – the best scones ever, dipped in two A-M-A-Z-I-N-G glazes (recipes courtesy of Inspired Taste). They were gone in a matter of hours, and I’ve been craving them ever since. The Month of Pumpkin, off to a truly delicious start. Enjoy in moderation!


{Better than Starbucks!} PUMPKIN SPICE SCONES

Yields: 12 scones

For the scones:

  • 1/2 cup canned pumpkin 
  • 1 large fresh egg
  • 3 tbsp heavy cream
  • 1 tbsp molasses
  • 2 tsp pure vanilla extract
  • 2 cups all-purpose flour, plus more for dusting
  • 1/4 cup plus 2 tbsp dark brown sugar
  • 1 tsp baking powder
  • 1/2 tsp baking soda
  • 1/2 tsp salt
  • 1 tsp ground cinnamon
  • 3/4 tsp ground ginger
  • 3/4 tsp ground cloves
  • 1/2 tsp ground nutmeg
  • 1 stick (1/2 cup) cold unsalted butter

For the sugar glaze:

  • 1 cup (125 grams) powdered sugar, sifted
  • 1 to 2 tablespoons half and half or cream

For the spiced glaze:

  • 1 cup (125 grams) powdered sugar, sifted
  • 1 tablespoon pumpkin puree
  • 1/8 teaspoon cloves
  • 1/8 teaspoon ground nutmeg
  • 1/8 teaspoon ground ginger
  • 1/4 teaspoon ground cinnamon
  • 1 to 2 tablespoons half and half or cream
  1.  Preheat the oven to 400°F/200°C. Line a baking sheet with parchment paper.
  2. In a medium bowl, whisk together 1/2 cup pumpkin, egg, heavy cream, molasses and vanilla. Set aside.
  3. In the bowl of a food processor fitted with the blade attachment, combine the flour, dark brown sugar, baking powder, baking soda, salt and spices. Process for 20 seconds to combine be (sure no lumps of brown sugar remain).
  4. Cut the cold butter into 1/2-inch chunks. Add to the food processor and pulse until the mixture resembles coarse meal — it should look unevenly crumbly with some pea-size chunks of butter within. Add the pumpkin mixture and pulse just until the mixture comes together. The dough will be very sticky, and you should still be able to see some pea-size clumps of butter.
  5. Lightly flour a clean countertop or work surface. Dump the sticky scone dough onto the floured surface and dust the top lightly with more flour. Using your hands, gently knead the dough until it comes together into a smooth ball. Divide the dough in half. Dust your work surface with flour again and form each half into a 5-inch circle, about 3/4-inch thick. Using a sharp knife dusted with flour, slice each circle into 6 even wedges (cut each circle in half, then cut each half into thirds). If the dough starts to stick to the knife, dust the knife with more flour. Place the wedges on the prepared baking sheet.
  6. Bake the scones for 12-15 minutes. To see if they are done, peek at the bottoms; they should be slightly browned but not burnt. Let the scones cool on the baking sheet for a few minutes, then transfer to a wire rack to cool completely.
  7. Meanwhile, make the glaze(s).
    1. For the sugar glaze, add the confectioner’s sugar to a medium bowl, then add one tablespoon of half and half. Stir, then judge the consistency (the glaze should slowly drizzle from the spoon). If it’s too thick, add a little more half and half (a little goes a long way). If it’s too thin, add a little more confectioner’s sugar. Dip each cooled scone directly into the glaze, then place glaze-side up onto the cooling rack.
    2. For the spiced glaze, combine the confectioner’s sugar, pumpkin puree and spices. Add one tablespoon of half and half, stir, and check consistency (adjust in the same way as you would the sugar glaze). Use a spoon to drizzle a zigzag pattern across each scone. Wait 15 minutes or until the glaze has set, then enjoy!


Chai Spice Snickerdoodles

chai-spice-snickerdoodles

I start each and every morning with an ice cold chai latte – and would like to end each and every evening with a freshly baked snickerdoodle – so the marriage of these two favorites sounded absolutely heavenly when I stumbled across this intriguing recipe on Taste of Home last month. The reality far exceeded even my expectations; the addition of ginger and green cardamom – two mainstays of traditional masala chai – took the beloved cookie of my childhood to a whole new level of awesome. These are fan-freaking-tastic slightly warm, so there’s no reason to hold off diving in until they’re completely cool. Enjoy in moderation!


CHAI SPICE SNICKERDOODLES

Yield: 4 dozen cookies

  • 2 cups sugar
  • 2 tsp ground cinnamon
  • 1 tsp ground ginger
  • 1 tsp ground cardamom
  • 1 cup unsalted butter, softened to room temperature
  • 2 large fresh eggs
  • 1 1/2 tsp pure vanilla extract
  • 2 3/4 cup all-purpose flour
  • 2 tsp cream of tartar
  • 1 tsp baking soda
  • 1/8 tsp salt
  1.  In a small bowl, combine the sugar, cinnamon, ginger, cardamom and allspice. Remove 1/2 cup sugar mixture to a shallow bowl; set aside.
  2. In a large bowl, cream butter and remaining sugar mixture until light and fluffy. Beat in eggs and vanilla. Combine the flour, cream of tartar, baking soda and salt; gradually add to creamed mixture and mix well. Cover dough and refrigerate for 2 hours.
  3. Preheat oven to 350°F/175°C. Shape chilled dough into 1 1/2-inch balls; roll in reserved sugar mixture. Place 2 in. apart on parchment paper-lined baking sheets and bake in preheated oven for 10-12 minutes. Cool for 2 minutes before removing from pans to wire racks.

Honey Mustard Chicken, Bacon + Avocado Salad

hcba-salad-copy

I can’t believe I’ve reached the last few weeks of summer and posted only posted TWO recipes to this blog. Bad food blogger, bad!

Perhaps I should give myself a bit of lee-way; it’s been a busy and at times difficult summer. Between a stressful job, a house full of much-loved guests, and a spouse with multiple broken bones from a sports injury, there hasn’t been much time to sit down and breathe, let alone focus on blogging (or much of anything else). Only after quitting my job, bidding fond farewell to our wonderful guests, and putting my hubs on the road to recovery has life finally slowed down to an easier pace. Halle-freaking-lujah!

Of course, I’m one of those people that – despite wanting a break for months – has to fill their first waking moment of free time with activity. In this case, I was only 10 minutes into relaxing on the couch with some Investigation Discovery (it’saddictiveAF) before deciding to have a casual peek at my recipe collection. Casual peek quickly transformed into detailed research, which then morphed into a cooking and baking agenda for the next four months (and a shopping list as long as a novel). And so went my rest time; I was on my way to the market before the murder had even been solved. It was nice knowing you, R & R!

All credit for this beautiful salad recipe goes to Cafe Delites, one of my favorite blogs of all time. The garlicky honey mustard dressing is the BOMB.COM – I’m not a mustard fan by any means, yet I devoured this salad in under 5 minutes! It also makes an unbelievably delicious marinade for the chicken – my husband already requested that I make this again soon. It’s a definite keeper – enjoy!


HONEY MUSTARD CHICKEN, BACON + AVOCADO SALAD

Yields: 4 servings

For the marinade/dressing:

  • ⅓ cup clear honey
  • 3 tbsp whole grain mustard
  • 2 tbsp smooth + mild Dijon mustard
  • 2 tablespoons extra-virgin olive oil
  • 1 tbsp finely minced garlic
  • Salt, to season
  • 4 boneless, skinless chicken breasts

For the salad:

  • ¼ cup diced bacon, trimmed of rind and fat
  • 4 cups Romaine lettuce leaves, washed
  • 1 cup sliced grape or cherry tomatoes
  • 1 large avocado, pitted and sliced
  • ¼ cup corn kernels


  1. Whisk marinade / dressing ingredients (through salt) together to combine. Pour half into a shallow dish, submerge chicken and marinade for  1 1/2 to 2 hours. Refrigerate the reserved marinade to use as a dressing.
  2. Heat one teaspoon of olive oil in a nonstick pan (or grill pan or skillet) over medium high heat. Once very hot, add chicken and cook, undisturbed, for 3-5 minutes, or until nicely browned on one side. Turn chicken over, cover, and reduce heat to medium. Cook for approximately 5 more minutes (depending on thickness of chicken), or until chicken is cooked through. Remove to a cutting board and let rest at least 5 minutes before slicing.  (Grill in batches to prevent excess water being released. Dispose of used marinade.)
  3. Wipe pan over with paper towel; drizzle with another teaspoon of oil and fry the bacon until crispy.
  4. Slice chicken into strips and prepare salad with leaves, tomatoes, avocado slices, corn and chicken.
  5. Whisk 2 tablespoons of water into the remaining dressing and drizzle over the salad. Sprinkle the bacon over the top and season with salt and freshly cracked pepper, if desired.

Peanut Butter Pie with Chocolate Cookie Crust

Chocolate Peanut Butter Pie FINAL

We’ve been experiencing uncomfortably high temperatures (and insanely high humidity) for the last several weeks in central Europe, meaning I’ve had no desire whatsoever to turn on my oven and get baking. That doesn’t mean, of course, that my notorious appetite for all things chocolate diminished in the slightest. Far from it! I was into my collection of no-bake dessert recipes within minutes of temps topping 90 degrees last week.

This pie has a very special place in my heart, as it’s been my dad’s favorite for as long as I can remember. In fact, I can scarcely remember a birthday or Father’s Day celebration in my childhood in which it didn’t make a welcome appearance. The filling is rich and creamy, cradled in a delicate chocolate cookie crust and topped with drizzled chocolate sauce and grated dark chocolate. I took it a step further (maybe too far?) on this occasion with the addition of chopped miniature Reese’s Peanut Butter Cups. A word of warning: this pie is not for the faint of heart … or dieters … or diabetics … but is definitely worth a try if you’ve got a peanut butter lover in your midst!

Note: If you’d like to craft a lower-fat version of this pie, use 1/3-fat cream cheese, reduced or low-fat sweetened condensed milk, reduced fat peanut butter and fat-free Cool Whip. I’ve made both versions and the flavor variations are minimal.

Enjoy!


PEANUT BUTTER PIE WITH CHOCOLATE COOKIE CRUST

Yield | 8 to 10 servings


  • 1 1/3 cup chocolate cookie crumbs (approximately 30 crushed cookies)
  • 3 ounces bittersweet chocolate, melted
  • 1 tbsp finely granulated sugar
  • 8 ounces cream cheese
  • 1 (14 ounce) can sweetened condensed milk
  • 3/4 cup creamy or chunky peanut butter
  • 3 tbsp freshly squeezed lemon juice
  • 1 tsp pure vanilla extract
  • 1 cup freshly whipped cream
  • 1 to 2 tsp chocolate syrup, to serve
  • 1 ounce grated dark chocolate, to serve


  1. In a medium-sized mixing bowl, stir together cookie crumbs, melted chocolate and sugar. Press firmly and evenly into a 9-inch pie plate. Chill crust for 30 minutes.
  2. In the bowl of an electric mixer fitted with a paddle attachment, beat cream cheese on medium speed until fluffy. Beat in sweetened condensed milk and peanut butter, blending for 1 minute. On low speed, add lemon juice and vanilla extract, blending until just combined.
  3. Remove bowl from electric mixer and gentle fold in freshly whipped cream. Pour pie filling into the chilled chocolate cookie crust and refrigerate for 4 hours or until set. To serve, drizzle with chocolate syrup and sprinkle with grated dark chocolate, if desired.


Habanero Turkey Chili with Honey Buttermilk Cornbread


Habanero Turkey Chili

It’s been a long, lonnnng time since I’ve posted to this blog, but I’m happy to be back with new recipes (the result of lots of summer cooking and baking!) this week. Hopefully this post kick starts my lazy blogging bum into gear, and I’ll be back with more recipes in the weeks and months to come!

This spicy homemade chili has been a family favorite for years. Adapted from the recipe for Boilermaker Tailgate Chili on AllRecipes.com, it’s also been my go-to meal for the happy occasions this summer that we’ve welcomed family and friends to our home in southern Germany. Despite the rather intimidating number of ingredients listed, this chili couldn’t be easier to prepare for a large group of weary, jet-lagged world travelers desperately in need of a protein boost. And if the protein doesn’t wake them up, the flavor surely will – this chili is spicy with a capital S. I personally like to take my spice level to the brink of hospitalization, but feel free to tinker with the amount of chili powder added if pepper-induced sobbing just isn’t your jam. (I recommend 2 tablespoons instead of 1/4 cup for those with less heat tolerance.)

And finally, let’s talk about cornbread. I LOVE cornbread. I’ve tried every conceivable type of cornbread known to man or woman, and this recipe is HANDS DOWN the best. It has the rare combination of perfect flavor (not too sweet, not too bland) and perfect consistency (not too cake-like, not too dry). I can’t imagine a better accompaniment to this spicy chili. Enjoy!


HABANERO TURKEY CHILI WITH HONEY BUTTERMILK CORNBREAD

Yield | 12 servings

For the chili:

  • 2 pounds ground turkey
  • 1 pound hot Italian sausage
  • 4 (15 ounce) cans chili beans in sauce
  • 2 (28 ounce) cans diced tomatoes
  • 1 (6 ounce) can tomato paste
  • 1 medium yellow onion, finely chopped
  • 1-2 habanero peppers, seeded + minced
  • 4 cubes beef (or chicken) bouillon
  • 1/2 cup beer
  • 1/4 cup chili powder
  • 1 tbsp Worcestershire sauce
  • 1-2 tbsp minced fresh garlic
  • 1 tbsp dried oregano
  • 2 tsp ground cumin
  • 2 tsp hot pepper sauce
  • 1 tsp dried basil
  • 1 tsp salt
  • 1 tsp ground black pepper
  • 1/2-1 tsp ground cayenne pepper
  • 1 tsp paprika
  • 1 tsp white sugar
  • Sharp cheddar cheese, shredded, to serve

For the cornbread:

  • ½ cup butter
  • 1 tbsp clear honey
  • 2/3 cup white sugar
  • 2 fresh eggs
  • 1 cup buttermilk
  • ½ tsp baking soda
  • 1 cup yellow cornmeal
  • 1 cup all-purpose flour
  • ½ tsp salt


To make the chili:

  1. Heat a large stock pot over medium-high heat. Crumble the ground turkey and sausage into the hot pan, and cook until evenly browned. Drain off excess grease.
  2.  Pour in the chili beans, diced tomatoes and tomato paste. Add the onion, habanero peppers, bouillon, and beer. Season with chili powder and remaining ingredients (through sugar). Stir to blend, then cover and simmer over low heat for at least 2 hours, stirring occasionally.
  3. After 2 hours, taste, and adjust salt, pepper, and chili powder if necessary. The longer the chili simmers, the better it will taste. Remove from heat and serve, topped with shredded cheddar cheese (or refrigerate and serve the next day).

To make the cornbread:

  1. Preheat oven to 375 degrees F (175 degrees C). Grease an 8 inch square pan.
  2. Melt butter and honey in large skillet. Remove from heat and stir in sugar. Quickly add eggs and beat until well blended. Combine buttermilk with baking soda and stir into mixture in pan. Stir in cornmeal, flour, and salt until well blended and few lumps remain. Pour batter into the prepared pan.
  3. Bake in the preheated oven for 30 to 40 minutes, or until a toothpick inserted in the center comes out clean.

Cadbury Crème Egg Ice Cream

Cadbury Ice Cream 001

Have you ever looked at your Easter haul of Cadbury Crème Eggs and thought to yourself, “These don’t contain quite enough sugar, fat and calories?”

No? Fair enough.

In all honesty, I haven’t either. I’ll be the first to admit that this ice cream isn’t healthy, or nutritious, or a good idea for diabetics. [It really, really isn’t.]

But if you like your desserts chocolate-y, creamy and sinfully rich – or you’re simply itching for a reason to bust out your ice cream maker just weeks into spring (becausesummerseemssofaraway) – this recipe is for you. Enjoy in moderation (think: a 1/2-cup serving every once in a blue moon – or better yet, share with friends!), then head outside, get active, and enjoy a beautiful new season!

{Note: I couldn’t track down miniature crème eggs in Germany, but it worked just fine to freeze the regular ones for 20 minutes (just to firm up) before chopping. They took a wee bit longer to melt down in the chocolate-cream mixture, but were well worth the extra effort!}


CADBURY CREME EGG ICE CREAM

Yields | 10 to 12 servings

Inspiration | Culinary Concoctions by Peabody


  • 3 1/2 cups heavy cream
  • 1/4 cup unsweetened cocoa powder
  • 3/4 cup finely granulated sugar
  • Pinch of salt
  • 2 tbsp light corn syrup
  • 1 tbsp + 1 tsp cornstarch
  • 4 oz milk chocolate
  • 8 oz miniature Cadbury Crème Eggs (unwrapped, chopped and divided)
  • 1 tsp pure vanilla extract


  1. In a non-reactive sauce pan over medium heat, whisk together 2 cups cream, cocoa, sugar, corn syrup, and salt; mix until smooth.
  2. In a small bowl, whisk together ¼ cup cream and cornstarch to make a slurry; set aside.
  3. Add the chopped chocolate and 4 ounces of the Cadbury eggs and whisk until completely smooth. Remove from heat.
  4. Add the remaining cream, cornstarch slurry, and vanilla. Whisk to combine.
  5. Pour the mixture into a large Pyrex bowl, cover with Saran wrap, and refrigerate until mixture is chilled through (about 1 hour).
  6. Pour the ice cream base into ice cream maker and process (per the machine’s instructions) until thick and creamy.
  7. Pack the ice cream into a resealable container, sprinkle with remaining 4 ounces of Cadbury Crème Eggs, and cover. Freeze for at least 4 hours (preferably overnight).


Pineapple Carrot Cupcakes

Pineapple Carrot Cupcakes 000

Happy Easter, baking gods and goddesses!

So … I’m one day late on holiday wishes AND blog posts. In my defense, I was busy cooking, over-eating and laying around in a food-induced stupor. If you don’t consider that much of defense, take heart! Some things are better late than never, and these cupcakes are most definitely one of those things.

As I’ve mentioned in earlier posts, many of the recipes featured on this blog – indeed, the blog itself – are inspired by and devoted to my late grandmother, Bonnie Jean. She loved food – shopping for it, cooking it, and of course, eating it – and centered every holiday around what inevitably became an epic family meal. If she were still here – and I swear sometimes she is! – she’d confirm that there’s no better end to an Easter meal than a giant slice of homemade carrot cake. THIS carrot cake.

You’re probably asking yourself: “But why pineapple?” Honestly, I have no idea. I have no idea why she put pineapple in her carrot cake. Or grape leaves in her homemade pickles. Or sour cream in her chocolate chip cookies. I just know they’re hands down the best carrot cake, pickles, and chocolate chip cookies ON THE PLANET. Maybe when I’m a grandmother, I’ll be let into their secret society of culinary sorcery. In the meantime, I don’t ask questions, and I add the damn pineapple. You should too!

{I made my grandmother’s recipe into cupcakes, but have also included the instructions for a sheet cake below.}

Enjoy!


PINEAPPLE CARROT CUPCAKES

Yields | 36 cupcakes


For the cupcakes:

  • 1 1/2 cups canola oil
  • 2 cups finely granulated sugar
  • 5 medium fresh eggs
  • 2 1/4 cups all-purpose flour
  • 2 tsp baking powder
  • 1 tsp baking soda
  • 2 tsp ground cinnamon
  • 1 tsp salt
  • 2 tsp pure vanilla extract
  • 2 cups grated carrots
  • 1 cup crushed pineapple
  • 1 1/2 cups chopped walnuts, divided

For the frosting:

  • 2 8-ounce packages cream cheese
  • 1 cup unsalted butter
  • 3 tsp pure vanilla extract
  • 4 to 6 cups confectioner’s sugar


To make cupcakes:

  1. Preheat oven to 350 degrees Fahrenheit. Line three 12-well cupcake pans with paper liners (if making a sheet cake, lightly oil a 9- by 13-inch cake pan). Set aside.
  2. In the bowl of an electric mixer fitted with a paddle attachment, beat oil and granulated sugar on medium speed for 30 seconds. As motor runs, add eggs individually. After eggs are fully incorporated, remove bowl from mixer.
  3. In a separate bowl, sift flour, baking powder, baking soda, cinnamon and salt. Stir, by hand, into sugar-egg mixture and blend thoroughly.
  4. Add 2 teaspoons vanilla, carrots, pineapple and 1 cup chopped walnuts; stir well. Pour batter into prepared paper liners until each liner is 3/4 full (or into prepared cake pan, spread evenly to edges). Bake cupcakes for 18 to 20 minutes (cake for approximately 1 hour), or until cake tester inserted in center comes out clean.
  5. Remove cupcakes from pan, transfer to a wire rack, and cool thoroughly before frosting (cool cake in pan).

To make frosting:

  1. In the bowl of an electric mixer fitted with a paddle attachment, blend cream cheese, butter, vanilla extract and powdered sugar (adjust powdered sugar to taste). Frost cupcakes (or cake) only when completely cooled. Sprinkle with remaining ½ cup chopped walnuts.


Brookies

Brookies1

I celebrated my 33rd birthday late last week, and spent my special day on an amazing holiday in Garmisch-Partenkirchen, a stunningly beautiful ski resort on the German border with Austria. I managed to cram all my favorite activities into the day: hiking, playing in the snow, exploring historic sites, and enjoying my hubby’s company. I also discovered what will be, for the rest of my days, a delicious birthday cake substitute: the Brookie.

For those that don’t know, my first name is Brooke – which makes the discovery of the Brookie such a fun one for me. A genius combination of two long-time favorites, Brookies pair the flavor and crackly surface of a brownie with with the soft, chewy texture of a cookie. And oh my goodness, are they fantastic! Fantastic enough to give up birthday cake, which was frankly unfathomable only a week ago. Give these a try for the chocolate lovers in your life, and enjoy 🙂

Brookies2


BROOKIES

Yields | 25 cookies

Inspiration | AllRecipes.com

  • 2/3 cup vegetable shortening
  • 1 1/2 cups packed light brown sugar
  • 2 large fresh eggs
  • 1 tsp pure vanilla extract
  • 1 tbsp water
  • 1 1/2 cups all-purpose flour
  • 1/3 cup unsweetened cocoa powder
  • 1/4 tsp baking soda
  • 1/2 tsp salt
  • 1 cup semi-sweet chocolate chips
  • 1 cup milk chocolate chips


  1. Beat vegetable shortening and sugar with an electric mixer in a large bowl until smooth. Beat in one egg until completely incorporated. Beat in second egg along with vanilla extract and water. Combine flour, cocoa powder, baking soda, and salt in a small bowl. Stir flour mixture into creamed mixture at low speed until just blended, then fold in chocolate chips. Cover and chill dough for 1 hour.
  2. Preheat oven to 375 degrees Fahrenheit (190 degrees Celsius).
  3. Drop spoonfuls of dough 2 inches apart onto ungreased baking sheets. Bake in preheated oven until cookies are set, 7 to 9 minutes. Cool 2 minutes on baking sheet; transfer cookies to wire racks to cool completely.

Frosted Banana Bars

Frosted Banana Bars

These Frosted Banana Bars are one of the greatest revelations of my baking “career.”

They are – admittedly – not much to look at.

They feature one of my least favorite foods – soft, blackened, nearly rotten bananas.

They don’t require any special tools, expensive ingredients or fancy techniques.

Yet, they are by far my most-requested dessert. OF ALL TIME.

No joke – I am asked on at least a weekly basis to make these yummy bars, and bake them just about as often for my husband and his co-workers. They are ridiculously delicious – soft and uber-flavorful, with just the right amount of sweetness – are super easy to make, and can be thrown together with ingredients that virtually everyone has on hand already in their pantry or refrigerator. I’d say “enjoy in moderation!”, but forget that bollocks. Pig out. You won’t be able to stop yourself!


FROSTED BANANA BARS

Yields | 24 servings

Inspiration | Taste of Home

For the bars:

  •  1/2 cup unsalted butter, softened to room temperature
  • 2 cups finely granulated sugar
  • 3 large fresh eggs
  • 1 1/2 cups mashed ripe bananas (about 3 medium)
  • 1 tsp pure vanilla extract
  • 2 cups all-purpose flour
  • 1 tsp baking soda
  • Dash salt

For the frosting:

  •  1 8-ounce package cream cheese, softened
  • 1/2 cup unsalted butter, softened to room temperature
  • 2 to 4 cups powdered sugar*
  • 2 tsp pure vanilla extract


  1. Preheat oven to 350° degrees Fahrenheit (175° Celsius). Grease a 15-inch x 10-inch x 1-inch baking pan; set aside.
  2. In a large bowl, cream butter and granulated sugar until light and fluffy. Beat in the eggs, bananas and vanilla. Combine the flour, baking soda and salt; stir into creamed mixture just until blended.
  3. Transfer to prepared baking pan and bake in preheated oven for 25 to 30 minutes, or until a toothpick inserted near the center comes out clean. Cool completely in pan on a wire rack.
  4. For the frosting, beat cream cheese and butter in a mixing bowl until fluffy. Add powdered sugar* and vanilla; beat until smooth. Frost bars when cool.

*Feel free to experiment with the amount of sugar in the frosting. Because I fancy my frosting a little less sweet, I usually add approximately 2 1/2 cups of powdered sugar. If you’d like it sweeter, add up to 4 cups total.